Sunday, October 30, 2011

Whole-Grain Blueberry Muffins = ♥

In our house breakfast usually lasts 5 minutes, before we rush off to start the day. I made these the other morning and after 2 weeks they've become a favorite breakfast staple. I love finding healthy things to feed my family. Peanut would also eat these, if only we loved her enough to share ; ).


  • 1 1/4 whole wheat flour, spooned and leveled
  • 3/4 cup oat flour (Or use 1 cup old-fashioned rolled oats*)
  • 1/4 cup flax seed meal (or use unleveled 1/4 cup flaxseeds*)
  • 1/4 cup pecans (optional)
  • 1 teaspoon baking powder
  • 1 teaspoon baking soda
  • 1/2 teaspoon kosher salt
  • 1 cup non-fat blueberry Greek yogurt
  • 1/2 cup light brown sugar, packed
  • 3 tablespoons unsalted butter, melted
  • 1/4 cup orange juice
  • 1 large egg
  • 1 teaspoon pure vanilla extract
  • 2 cups fresh blueberries (or one 8-ounce bag frozen blueberries)

Directions:


  1. Heat oven to 375* F. Line a standard 12-cup muffin tin with paper liners.
  2. *In a food processor, process the flours, whole oats, flaxseeds, pecans until finely ground (I skip this extra work by just using flours or meals instead).
  3. In a small bowl combine Wheat and Oat Flour, flaxseed meal, Peacans, baking powder, baking soda, and salt.
  4. In a large bowl whisk together the yogurt, sugar, butter, juice, egg and vanilla. Add the flour mixture and mix until just incorporated (do not overmix). Fold in the blueberries.
  5. Divide the batter evenly among the muffin cups. Bake until a toothpick in the center comes out clean, 22-25 minutes. ( I find these don't rise too high, I think it might be the density of the flours, so don't be afraid to pack them in).
    TO MAKE AHEAD: The muffins will keep at room temperature for 3 days and in the freezer for 1 month. Warm in the microwave, 1 to 2 minutes.

Tuesday, October 25, 2011

Egg shell seedlings

I'm definitely a throw-caution-to-the-wind kind of gal. I learn best from my mistakes and I think that makes me a foolish/wise person. I'm working towards wise...

 Empty Egg Carton

Trimmed up carton with seeds to plant.

Carton with each space labeled. Along with labeling the carton, I label the shells.
This batch of seedlings I'm sprouting Chives, Parsley and Scallions. 

In the shells I take a tapestry needle (any needle will do) and poke 1-3 holes large enough to let water out and small enough to still retain the soil.
In a mixing bowl add 1/2 cup "jiffy-mix" with water, until you reach a wet breadcrumb consistency. Add about 1 tbsp into each shell and lightly pat down. You want to form a seed well into the center of each shell. (Note: Do not try making cornbread with this mix.)

Add 3-4 seedlings of the appropriate plant to each shell. Then I added another 1/2 tsp of soil mix on top and lightly patted down. 

Here they are planted.

 Electrolytes, it's what plants crave! Ok, I just reuse this for tappĂ© water. The spout makes it sprout friendly. I add 5-8 drops a day and keep covered in this gallon sized zip-lock bag. It lets the sun through, but doesn't let the moisture out. It should stay on for 1-2 week or until the sprouts are too large.
You'll want to replant in about 21 days or when you see the second set of leaves sprouting. Different plants take longer to germinate than others. Good luck and happy gardening.


Gardening

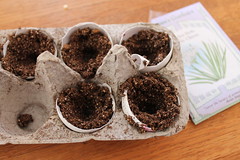
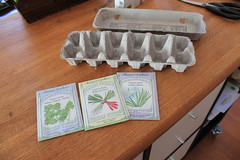
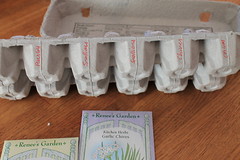
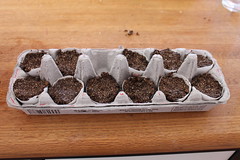
The good thing about living in California is long growing seasons and this year I've thrown caution to the wind. I'm trying my hand this fall at gardening some greens.  I started by sowing seeds in egg shells to see how it worked.
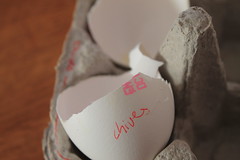
Here they are after they started to sprout!

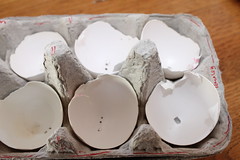
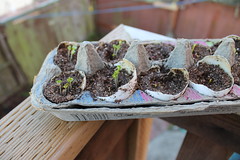
I did find that after they started sprouting, it looked as if they were quickly running out of room in their shells. I lifted a few shells up after a week of sprouting and the little white (healthy) roots were starting to emerge from the drainage hole in the shell. 

It was important to get my little seedlings in a new home. As luck would have it, I recently took an edible container gardening class at the Garden for the Environment... and Johanna Silver of  Sunset Magazine gave a very useful lesson. I built a self watering container garden. 

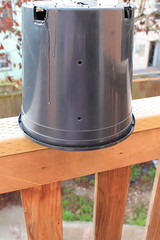
I went to home depot to buy some supplies, a black cheap ($2.89) planting pot. I drilled some holes in 8 places. Using a 1/2 inch hole bit I also drilled a hole on the bottom (top) for the watering spout
I found this "watering spout" in the plumbing section. Originally intended for an extension pipe for under sink plumbing, it included a threaded section. It worked out well for the purpose it was intended to do.
 Large Container (Hole Drilled about 2" below total height of black pot) I think the black pot was 8" depth, which would make the hole, which is really hard to see about 6" from the bottom.  
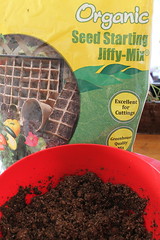
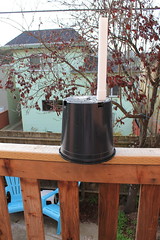
Shown here with 1 bag of  potting mix
This pot took 3 bags of 8 qt organic potting mix (potting soil is too heavy for container gardening) Since my seedlings were still a little young the 1-2" top level of soil I mixed in some seedling "jiffy" soil.
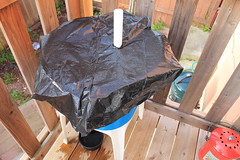
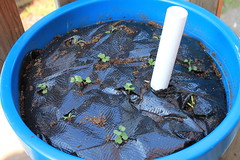
 The bane of gardening is weeding, so lets add a "weed barrier" (a.k.a trash bag). I trimmed it all around about 2" from the edge and tucked it into the soil.
 Here is an image of the planted seedlings in their pot. It shows the tucked in bag, and re-homed seedlings. I cracked the shells near the bottom, smooched them a little to fit in the X cut holes. I kind of ignored suggested guidelines to how close they can be planted, but I'm willing to sacrifice one or two to figure it out. Once the seedlings take to their new home, I was going to add some stones on top of the bag. I sprouted and planted Dwarf Kale, Neon Chard and Gai-lan.

As it turns out:

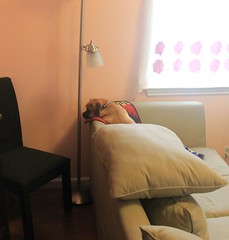
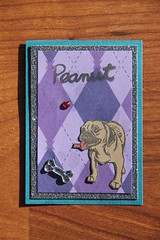
Peanut also likes to garden.

Tuesday, October 11, 2011

Making Apple Sauce

 With our apple picking spoils, I decided to make some apple sauce. Here we have about a dozen smallish honey crisp apples.  I washed up the apples, peeled, cored and diced.


 I added about 2 cups of water and 1/2 tsp cinnamon. I did not add sugar, I didn't think it needed any. Obviously, this is personal preference.

Cook  over medium-low heat for 30 minutes or until the apples start breaking down when you stir them.  Once they were cooked down I used an immersion blender to puree the apples. This can also be achieved using a food processor or blender.

Caution: When blending warm things in a standard blender, don't overload and use a towel to hold the lid down.
 
Served with some grass-fed beef meatloaf, and roasted delicata squash.

Monday, October 10, 2011

Peanut Poppers

After a month of some random scrap treats we had lying around, I finally made Peanut what she loves, Peanut Poppers. She'll do anything for these treats and will whine under the jar after I make them. So here are the photos and recipe from our day.

Recipe:
1 (14oz) Can Pumpkin Puree (Not Pie Mix)
1 Cup Peanut Butter
1 egg
3-4 Cups Flour. I usually use Oat Flour, but this time we were out and had an over abundance of wheat flour. ( I found the wheat flour yielded a slightly more elastic, due to it's higher glutens)


Mix together and roll out, we roll them on the thick side. These are harder for Peanut to get out of her Kong Genius. Here Peanut is making sure her treats are kosher and standing in as the puppy rabbi.

Bake 275* for 2-3 hours. Until hardened. If they smell like they are slightly browning, just leave them in the oven and turn off the heat.


Peanut found the baking process to be cruel and unusual puppy punishment, and made her feelings known by looking sad and too cute. Thankfully 3 hours later, the treats were hard enough to put away...

Notice the Rabbi in the background. She over see's the whole process! Such dedication.

Final results: Two Paws up for a sitting pretty!!

Saturday, October 8, 2011

Goat Cheese Class

 Being the new kid on the block always stinks, even more so when you don't have a job to at least meet new people. So I found an interesting place to take some classes at : Garden for the Environment. Last week Adam and I took their free composting class and it was pretty informative. 
This weekend I went ventured out on my own and took a cheese making class. The instructor, Nicole Easterday was really funny and incredibly informative. We made some pretty yummy goat cheese and she had some that she made the other day with herbs in it. Yummy, but we were in for another great treat. Jalapeno Jam made by INNA jam. I came home raving about this amazing jam I had, and then figured I had to make some! 
We were both pretty tired and didn't want to do much this weekend, so we walked peanut to the store and picked up some ingredients to make our own Jalapeno Jam. 

We couldn't get our hands on any crack, which I insist is the secret ingredient in the INNA jam (SO TASTY!!!). We opted to make a Calico Jalapeno Jam, which uses Green Jalapenos and mixed colored bell peppers.  I blended up the peppers and used 2 cups less sugar than the recipe called for.  
Careful not to spill any on your hot burner, it'll fill your kitchen with a lovely burnt sugar smell followed by a pepper heat that hits you.
Here are our Pepper Jam Bounty, I really love the little Jars for Jams, it makes it more manageable, but you use what you have. :)  I've got a small container setting up, I'll let you know how it turns out.


Friday, October 7, 2011

The Butterfly Project LTC - Rare

Limited, These cards fell far too close to our wedding date and I was only able to make a few. It was to be made for The Butterfly Project LTC ring hosted by my friend Turtlegirl19.

Tricks & Treats: Noir Stalker

My Favorite Pet: Peanut the Puggle

It's true she really is my favorite pet!

Spring Faries!: Giggles in the Garden

Bountiful Bouquet: Narcissus

This stamp was recycled from a Postal Letter Boxing Ring: Be My Valentine.

Bountiful Bouquet: Buds and Beauty

Rare

Winter Wonderland: Let it Snow

I really loved how this stamp detail came out I used it for my 2010 Christmas Cards.

Gone Wild-again!: Oriental White Stork (S)

Hello Kitty and Friends: Pochacco

Snow Place Like Home

Halloween GAME: Activity: Scrying

Happy Halloween: Vampire, Bats

Little Bear: Famous Fictional Bears

One of a Kind - Winnie's Friendship

Created this card for my best friend, Jami.

Preoccupations - My Appoligies

Time sure does fly by,
but I've been busy, Adam got a new job in San Francisco and in March I quit my job and we moved to the SF Bay are and I continued with my planning. October 17th started that giant planning ball rolling....
and by September 03.2011, I became a Mrs!
In between then and now I produced a few... ok a lot of LTCs. Today I finally got a chance to grab a photo so that I might add them here and pick back up where I left off.